The dugout with their own hands: detailed description and drawing
At one time dugouts were very commonkind of home. First of all, they do not require large construction costs; the second advantage is their concealment - in comparison with conventional houses, it is much more difficult to notice them. Third advantage: such structures are very well insulated. In winter it is not cold in them, but in the summer it is very cool. The fourth advantage is the speed of erection. Unlike most buildings, you can build a dugout for the day, if you do not get distracted, and even more so if you do not work alone.
Naturally, in modern conditions, practicalthe need for a dugout appears infrequently. Fans of environmental housing can resort to such a shelter, but there are not so many. The second most important users can become owners of vegetable gardens, located quite far from the city: there will be few such lodgings, which is a good protection for the time when you are absent on your site. The third category of potential tenants is extreme travelers, intent on spending a month or two in the forest (taiga). In their case, this is the ideal refuge. But even if you do not belong to any of these categories, extra knowledge has not harmed anyone yet.

Define in terms of
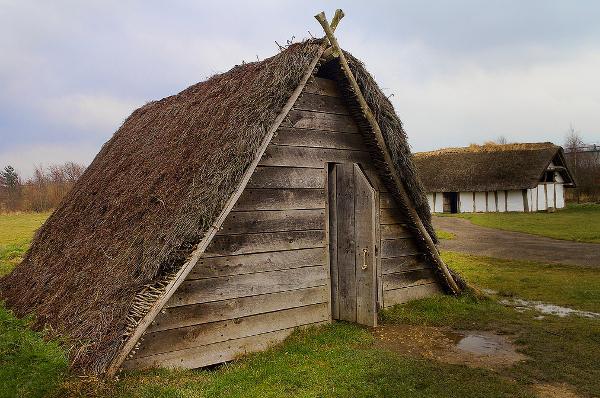
Most people believe that the dugouthands made or found and adapted to their needs) - it's necessarily something raw, dark and underground. However, this is not entirely true. The room, which is completely underground, among experts is called the "fox hole". In life, it is suitable for everyday needs is much less and interesting except that partisans during the fighting. This dugout is more attractive and comfortable.
The dugout as it is
Naturally, the main purpose of such housing- Survival, and the most comfortable. In addition to the already listed advantages, the dug-out in the forest has a number of other advantages. First, it keeps the heat well, even when the fire is extinguished. A roll-up or a hut will not provide you with this convenience. And if you equip a dugout with an oven, it will not yield to a stone or mud house.

The burrows located deep underground are alwaysuncooked. The dugout is not in danger, unless it is in a swamp, or too close to the pond, and even in the sandstone. However, a reasonable person is able to foresee such consequences.
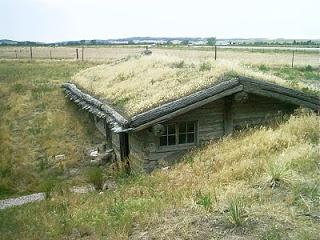
If you are interested in invisibility - put onthe roof of the turf and make it not too geometric. Over a week, the cover will take root, and your shelter will look like another hillock, even if it is located in an open area. In the forest in general, hardly anyone will notice your home.
Necessary materials
To tell the truth, the dug-out is erected by the handsusually from what is available. However, if it is possible to deliver "non-natural" materials to the construction site that can facilitate further operation, it is better to use it. So, under the most favorable conditions, 12 rollers (if their length is 2.5 meters), 70 poles of 6 m and 120 - 5 and a half, lapnik - about five cubes, wire (kilograms eight) and 2 sheets of roofing iron will be needed. If there is a stove, window and door - the dwelling will be especially comfortable, but both can be replaced with improvised materials, albeit with a loss for convenience.

Additional tricks
In principle, the correct dugout allowswalking along it in full growth. However, in the most primitive case of building a dugout, made with his own hands, special amenities can not offer. Living conditions can be improved if the floor is laid out with boards or tightly fitted poles. They can also cover the walls of the shelter: both aesthetically, and warmer (in the summer - cooler, thermal insulation yet). In the case of a planned wintering, the walls are coated with clay and sodded; it is also advisable to equip the vestibule with a second door. It is possible to deliver modern insulating materials (for example, foam plates) to the construction site - the dug-out will become even more reliable and warmer.
Replacement options
Naturally, it is not always possible to deliver everythingnecessary to the place of construction of the shelter. Do not worry: modern materials can be replaced by old ones. If a dug-out is being built with your own hands, and there is no way to bring the wire-donkey, cut thin branches (preferably from willows, if it is nearby), get young roots of spruce. For the insulation is very good moss. Naturally, it will have to be dried, so that it does not rot alongside the walls.
Well, now you can understand in detail how to make a dugout with your own hands.
Location rules
Before you start construction, it is worthcorrectly plan everything. For starters, consider the prevailing winds. The dug-out should be located so that the prevailing wind blows from the side, into the wall where there is no door.
The best place where your hidden home will be is a slope of the hill or a slightly elevated area - so there is less chance of flooding with groundwater.
Preparing a drawing of the future construction, lay instock size. Before you make a dugout with your own hands, you have to remember that from the inside it will be insulated, that is, at least be covered with boards. A reasonable people also insulate the heater, so the thickness of the boards should be multiplied by three (two layers of wood plus a layer of insulation).

initial stage
When everything is calculated and marked, thethe most difficult, laborious and uninteresting stage. If there is a turf on the spot, it must be removed. It is useful in the future, both for warming and for disguise. The most uninteresting stage of work on how to make a dugout with your own hands is digging a hole. First digging a bayonet with a shovel, with the earth loosening. Then in the course goes soviet - it soil is thrown out of the planned foundation of centimeters to 50 from the edge. Closer it is impossible: the perimeter is intended for the formation of the roof. The pit should result in a depth of two meters (in the dugout, you still need the floor).
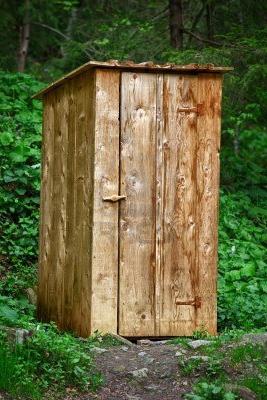
Before you build a dugout, think about itlocation of the entrance. It should be convenient and as low as possible. Even if you are not hiding, there is an element of intrigue and play in stealth: your children will obviously be interested. For the entrance a sloping oblique pit is digged, into which the steps are cut. Usually 3 pieces are enough.
Actual erection
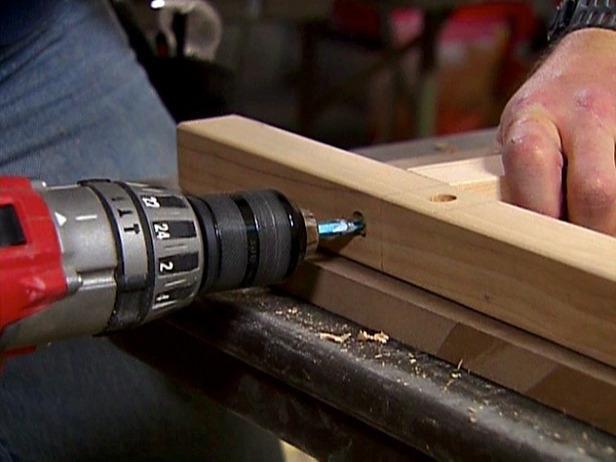
When the foundation pit is ready, poles forsupport and put the rafters. The latter can be strengthened in the ground or placed on the ground. They are a drill or logs laid on the ground. If you are thinking about how to build a dug-out only from improvised materials, then the rafters, and the pillars are made from the driller. Who does not know, the driller is the trunks of trees with a diameter of 5-11 cm. If delivery of materials is possible, the driller is replaced by metal pipes, a channel, corner or other building material. The main quality required for pillars and rafters is strength.
The roof is the most important
In any building, the main thing is the foundation and the roof. If the walls are not too reliable, they can be reinforced later. With a base and a coating, this focus will not work: they must be reliable from the very beginning. Therefore, if you are interested in how to build a dugout with your own hands, pay special attention to the top. On rafters it is necessary to put poles, and not the most thin, 3-5 cm in diameter. It will be your ceiling. They need to be put in place, trying not to allow gaps. You will also need to fasten it, either with wire (bast, flexible branches) or with nails.
It only remains to install the stove (asThe chimney is just sawed in the roof of the hole, where the pipe is removed from it) and trim the planks of the plank bed. If you need some kind of aesthetics - use, for example, pictures. The dugout can be not only convenient enough, but also a beautiful dwelling.